
Introduction
Mold can grow in unexpected places, often behind walls where it is not immediately visible. Detecting hidden mold growth is crucial for maintaining a healthy indoor environment. This guide will walk you through the steps to identify these hidden threats and ensure your home remains safe from the dangers of mold.
Table of Contents
- Understanding Hidden Mold Growth Behind Walls During Home Inspections
- Equipment for Detection and Why It’s Essential
- Inspecting the Walls: What to Look For
- Using Thermal Imaging for Mold Detection
- Borescopes and Borescope Inspection for Hidden Growth
- Air Sampling and Spore Trapping to Detect Mold
- Lab Testing for Verification of Hidden Mold
- Taking Action on Hidden Mold: Steps You Can Take
- Expert Tips for Detecting Hidden Mold Growth
- Frequently Asked Questions About Hidden Mold Detection
- Conclusion: Mastering the Art of Hidden Mold Detection
Understanding Hidden Mold Growth Behind Walls During Home Inspections
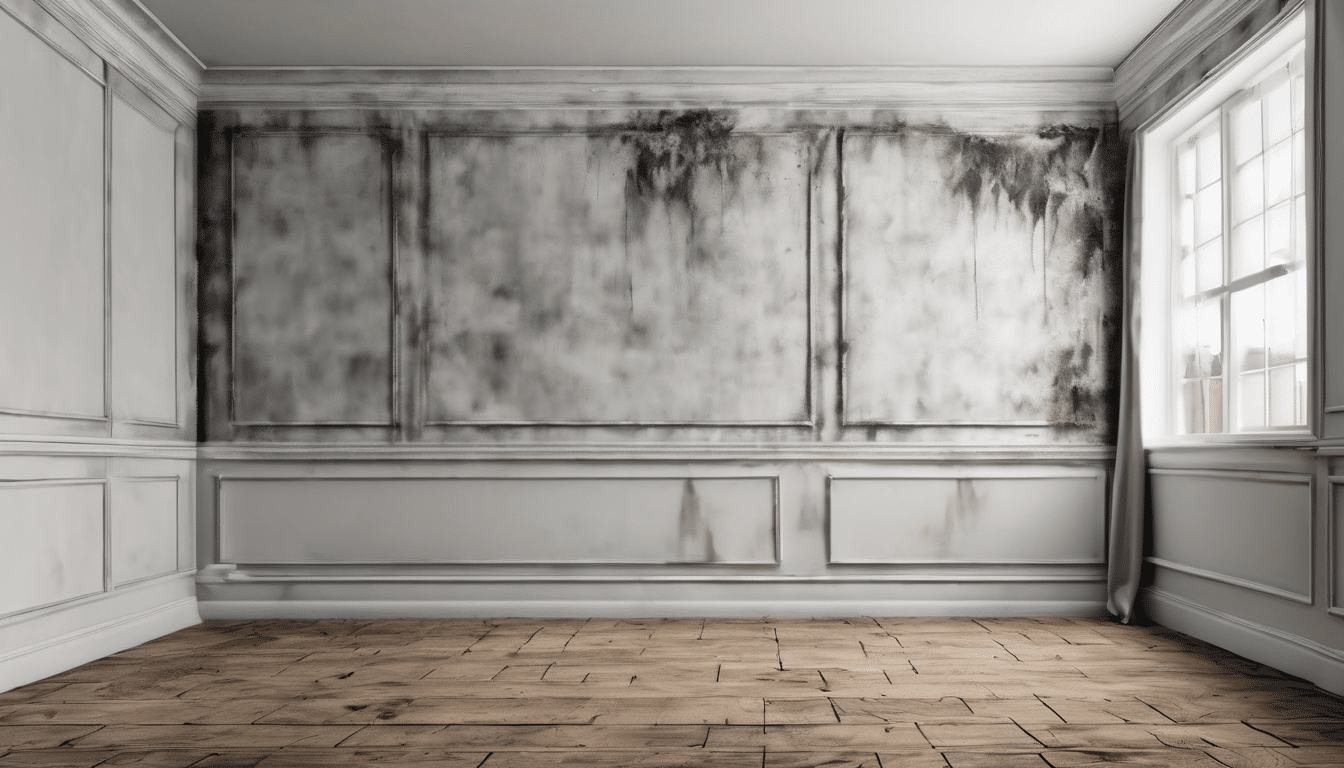
Hidden mold growth behind walls during home inspections is a common problem, often caused by moisture issues and poor ventilation. Understanding the risks associated with hidden mold is crucial for effective detection and remediation. According to studies, prolonged exposure to mold can lead to respiratory problems, allergic reactions, and even more severe health conditions.
Equipment for Detection and Why It’s Essential
To detect hidden mold, you need specialized equipment including:
- Thermal imaging cameras
- Borescopes
- Air sampling devices
- Moisture meters
- Hygrometers
Each tool has unique advantages in identifying moisture levels, inspecting inaccessible areas, and capturing spore samples.
Thermal Imaging
Thermal imaging can detect temperature differences that may indicate moisture buildup. These cameras provide a non-invasive way to identify potential mold growth without damaging the wall surface.
Borescopes
Borescopes allow you to inspect hidden areas such as ductwork, ceiling cavities, and voids. This tool is particularly useful for homes with complex building envelopes where visual inspection alone may not be sufficient.
Inspecting the Walls: What to Look For
During your home inspection, pay close attention to areas prone to moisture issues:
- Bathrooms and kitchens
- Basements and crawl spaces
- Areas near plumbing
- Exterior walls with poor insulation
- Around windows and doors
Look for signs of water damage such as discoloration, musty odors, or peeling paint.
Using Thermal Imaging for Mold Detection
Thermal imaging is an effective tool for identifying hidden mold. Here’s how to use it:
Step One: Prepare the Area
Clear obstructions and ensure the area is dry before conducting a thermal imaging scan. Moisture can affect the accuracy of results.
Step Two: Conduct a Visual Inspection First
Perform a preliminary visual inspection to rule out obvious moisture issues. This will help identify areas needing more thorough investigation.
Step Three: Set Up Your Thermal Imaging Camera
Position the camera at an optimal angle to capture the full range of your target area. Adjust settings such as temperature scale and contrast for better visibility.
Step Four: Take Thermal Images
Take multiple images from different angles, focusing on areas showing signs of water damage or mustiness. Store these images for future reference.
Step Five: Analyze the Results
Review the thermal images for any temperature anomalies. Higher temperatures often indicate moisture buildup, which can lead to mold growth.
Borescopes and Borescope Inspection for Hidden Growth
Borescopes are essential for inspecting hidden areas:
Step One: Prepare the Borescope Equipment
Ensure your borescope is clean and free of debris. Assemble all necessary components including lighting systems.
Step Two: Insert the Borescope into the Inspection Area
Gently insert the borescope into the chosen inspection area, such as a ceiling cavity or wall void. Use caution to avoid damaging existing structures.
Step Three: Inspect the Interior Surfaces for Mold Growth
Observe the interior surfaces using the borescope’s high-resolution camera. Look for signs of mold growth such as discoloration or mustiness.
Step Four: Document Findings and Share with Professionals
Document all findings from the borescope inspection, noting any areas of concern for further investigation.
Air Sampling and Spore Trapping to Detect Mold
Air sampling is critical for detecting hidden mold behind walls during home inspections:
Step One: Choose the Right Air Sampling Device
Select an air sampling device that meets your needs. Common options include settling plates, air spore traps, and impactors.
Step Two: Set Up Your Testing Area
Prepare the testing area by identifying potential sources of mold growth. Place your sampling device in areas most likely to contain hidden mold.
Step Three: Conduct the Sampling Process
Follow the manufacturer’s instructions for conducting air sampling. This typically involves setting up equipment and leaving it in place for a specified period.
Step Four: Analyze Spore Samples for Mold Identification
Send the collected samples to a laboratory for analysis. Laboratory technicians will identify any species of mold present.
Lab Testing for Verification of Hidden Mold
To confirm suspicions about hidden mold, lab testing is essential:
Step One: Collect Samples from Potential Areas
Use tools like swab kits or tape lift samples to collect potential mold growth from identified areas.
Step Two: Send Samples to a Professional Lab for Analysis
Package collected samples in a sealed container with appropriate labeling. Contact a professional lab specializing in indoor air quality testing.
Step Three: Review Laboratory Findings and Take Action
Once you receive the laboratory report, carefully review the findings. If hidden mold is confirmed, follow the recommendations for remediation.
Taking Action on Hidden Mold: Steps You Can Take
If you suspect or confirm hidden mold growth, take immediate action:
Step One: Address Moisture Issues
Identify the source of moisture causing hidden mold growth. This may involve repairing leaking pipes, addressing roof leaks, or improving ventilation.
Step Two: Contain the Area During Remediation
Use negative pressure containment techniques to prevent cross-contamination. Set up HEPA-filtered air scrubbers to filter out airborne mold spores.
Step Three: Use Proper Personal Protective Equipment (PPE)
Wear appropriate PPE during remediation, including N95 respirators, gloves, and protective clothing.
Step Four: Perform a Thorough Clean-Up and Disinfection
Thoroughly clean affected areas using EPA-approved biocides or other effective cleaning agents. Focus on removing visible mold growth and water-damaged materials.
Step Five: Verify Mold Removal with Post-Remediation Testing
After remediation, conduct post-remediation testing to ensure all hidden mold has been effectively removed.
Expert Tips for Detecting Hidden Mold Growth
Here are expert tips to enhance your ability to detect hidden mold behind walls during behind walls during home inspections:
Tip One: Regularly Monitor Humidity Levels
Use a hygrometer to regularly monitor humidity levels throughout your behind walls during home. Aim for relative humidity between 40-60%.
Tip Two: Keep a Detailed Inspection Log
Maintain an inspection log to document any areas showing signs of moisture or mustiness. This helps identify patterns over time.
Tip Three: Use Advanced Detection Tools
Incorporate advanced detection tools such as thermal imaging cameras, borescopes, and air sampling devices into regular inspections.
Tip Four: Consult with Professional Indoor Environmental Scientists
If you suspect hidden mold or encounter complex situations, consider consulting a professional indoor environmental scientist.
Frequently Asked Questions About Hidden Mold Detection
Q: Why is it important to detect hidden mold growth? A: Hidden mold can pose significant health risks, especially for individuals with allergies or respiratory conditions. Early detection helps protect the indoor environment and promotes long-term occupant health.
Q: What are the risks associated with hidden mold growth? A: Risks include respiratory problems, allergic reactions, asthma exacerbation, and structural damage to buildings over time.
Q: Can you provide tips for preventing hidden mold growth in my home? A: Focus on addressing moisture issues promptly and maintaining proper ventilation. Regularly check for signs of water damage, address any leaks immediately, use dehumidifiers in moisture-prone areas, and ensure your HVAC system functions optimally.
Conclusion: Mastering the Art of Hidden Mold Detection
Detecting hidden mold behind walls during home inspections requires a combination of knowledge, tools, and expertise. By following this comprehensive guide, you can identify potential issues early and take appropriate steps to ensure a safe and healthy indoor environment for you and your family.
Regular monitoring, proper equipment usage, and professional consultation when needed are key to successfully managing hidden mold risks. Remember that early detection and prompt action are your best defenses against the health and structural problems that mold can cause.